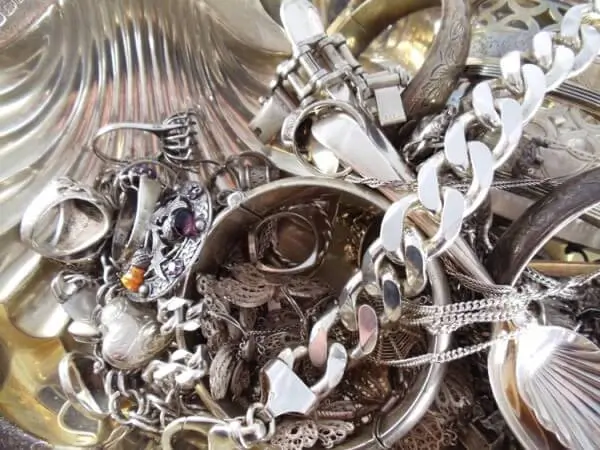
Sterling silver has a beauty that feels timeless, which is why so many people choose it for rings, necklaces, bracelets, cutlery, heirlooms, and decorative pieces that last for generations. But this metal also comes with a challenge: it tarnishes easily. A piece that shines brilliantly today can look dull and dark only a few weeks later, especially if it’s exposed to humidity, skin oils, or everyday air pollution. Tarnish is a natural reaction between the silver alloy and sulfur compounds in the environment, and once it starts forming, it rarely stops on its own.
People often look for faster, more efficient ways to restore their sterling silver without spending hours polishing by hand. That’s usually what leads to the question: Can sterling silver be cleaned safely in an ultrasonic cleaner? The idea is appealing because ultrasonic cleaners are known for reaching tiny crevices and lifting dirt with very little effort. But because silver is a relatively soft metal, and because tarnish is a chemical layer rather than simple dirt, the cleaning method you choose matters more than you might expect.
Sterling silver is made of 92.5 percent pure silver and 7.5 percent alloy—usually copper. This alloy gives silver the strength it needs for daily wear, but it also makes it much more reactive. Copper tarnishes more easily than silver and reacts strongly to environmental chemicals, cleaning solutions, and temperature changes. When you place sterling silver into an ultrasonic cleaner, you’re exposing both metals in the alloy to intense vibration, microscopic cavitation bubbles, and potentially heated solution. All of those factors can clean effectively, but they can also exacerbate tarnish or reveal weaknesses in solder joints, settings, or engraving work if the cleaning conditions aren’t ideal.
Proper cleaning becomes an even more delicate matter when gemstones or mixed materials are involved. While sterling silver alone might tolerate ultrasonic cleaning under certain conditions, many stones—especially soft, porous, or heat-sensitive ones—will not. This becomes an important point when dealing with rings, earrings, pendants, and bracelets where the silver is only one part of the piece.
Traditional cleaning methods like polishing cloths or mild silver dips can brighten sterling silver, but they also come with drawbacks. Polishing cloths struggle to reach deep grooves or detailed engravings. Chemical dips can strip silver plating, over-brighten the surface, or create uneven patches. Some dips leave behind residues that make silver tarnish even faster afterward.
Ultrasonic cleaning seems like a perfect solution because it uses sound waves rather than friction or overly aggressive chemicals. When everything is done correctly, it can remove dirt, oils, and light tarnish with impressive speed. But sterling silver is unique among metals. It demands a thoughtful approach, a proper solution, and a clear understanding of when ultrasonic cleaning works well—and when it should be avoided.
How Ultrasonic Cleaning Works
Ultrasonic cleaners look simple from the outside, but inside the tank, thousands of microscopic events are happening every second. These events are what make ultrasonic cleaning so uniquely effective for removing dirt, oil, and residue from even the most complicated shapes. To understand whether sterling silver responds safely to this process, it helps to look closely at what’s happening beneath the surface of the water.
An ultrasonic cleaner uses high-frequency sound waves—usually between 40 kHz and 68 kHz in consumer models, and sometimes higher in professional units. When these sound waves travel through a liquid, they create rapid pressure changes. During low-pressure cycles, tiny vacuum bubbles begin to form in the fluid. During high-pressure cycles, those same bubbles collapse with astonishing force. This phenomenon is called cavitation.
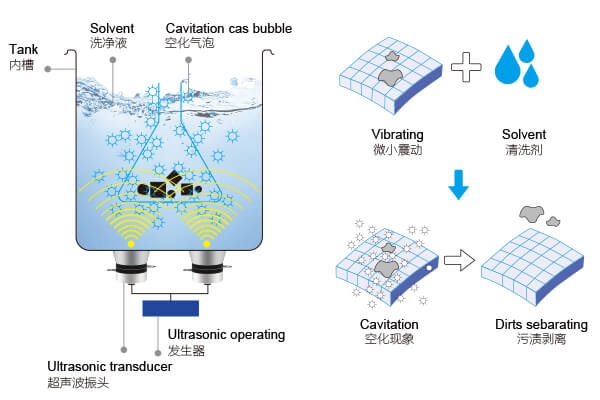
Although cavitation happens on a microscopic scale, the combined effect of millions of collapsing bubbles creates a powerful scrubbing action. It is not scrubbing in the way a brush or cloth works; there is no friction, no contact, and no abrasion. Instead, the energy released when each bubble collapses pushes away dirt, grease, debris, and microscopic particles that cling to surfaces. Cavitation can reach into cracks, gaps, engraved details, chain links, and hidden corners that human hands simply can’t access.
The cleaning strength of an ultrasonic bath depends on several factors:
- The frequency of the sound waves
- The power of the machine
- The shape and size of the tank
- The temperature of the liquid
- The type of cleaning solution used
Even small changes in these areas can change the cleaning outcome. Warmer water, for example, reduces viscosity, helping bubbles form more easily, but water that’s too hot weakens the force of cavitation. Cleaning solutions with the wrong chemical balance can create too much foam, blocking ultrasonic waves and reducing cleaning power. Some solutions enhance cavitation, while others suppress it.
Cavitation is non-abrasive, but it is not completely passive. Anything placed inside the tank is exposed to continuous vibration, rapid pressure changes, and energetic bubble collapse. Most metals tolerate this extremely well, and many gemstones can handle it too. But softer materials, porous stones, loosely set jewelry, and certain adhesives do not respond well.
Sterling silver sits in an interesting place within this equation. On one hand, the metal itself is strong enough to handle ultrasonic vibration. On the other hand, silver tarnish is not grime—it’s a chemical change on the metal surface. Cavitation removes physical dirt but cannot reverse tarnish. If the silver is heavily tarnished, the ultrasonic cleaner won’t magically restore its brightness. Instead, the underlying cleaning solution and the chemical composition of the tarnish determine what happens.
When ultrasonic cleaners are used correctly, they excel at removing:
- Skin oils
- Lotion and soap residue
- Dust and debris
- Food particles
- Light tarnish embedded in small crevices
- Build-up inside chain links
- Contaminants behind stone settings
These are areas where ultrasonic cleaning shines—no pun intended—especially for silver pieces with detailed filigree work or intricate designs.
But the process also reveals weaknesses. If a piece has loose stones, old solder, hollow construction, or pre-existing cracks, cavitation may worsen the problem. And if the cleaning solution is not compatible with sterling silver, the ultrasonic action can accelerate chemical reactions that dull the surface or create spotting.
Now that the physical mechanism is clear, the next question becomes the most important one: Is this process actually safe for sterling silver?
Can You Clean Sterling Silver in an Ultrasonic Cleaner?
The short answer is: yes, you can clean sterling silver in an ultrasonic cleaner, but only under the right conditions. Sterling silver is generally sturdy enough to tolerate ultrasonic cavitation, and many jewelers use ultrasonic cleaners daily as part of their workflow. However, ultrasonic cleaning is not a universal solution for every silver item. There are important limitations, risks, and conditions that determine whether ultrasonic cleaning is effective, safe, or potentially damaging.
When used correctly, ultrasonic cleaning can refresh sterling silver by removing dirt, oils, lotion residue, makeup, sunscreen, and the tiny particles that lodge themselves into chain links or engraved patterns. It can make intricate jewelry look brighter because it lifts away debris that dulls the metal’s appearance. If a silver ring or bracelet looks dingy because of grime, not deep tarnish, the ultrasonic cleaner can produce an excellent transformation with minimal effort.
Where many people get confused is the difference between tarnish and dirt. Tarnish is a chemical reaction—silver reacting with sulfur compounds in the air, forming silver sulfide on the surface. Cavitation does not reverse this reaction. Ultrasonic cleaning may loosen tarnish flakes or break up surface grime that hides tarnish, but it does not dissolve tarnish chemically. Only a tarnish-removing solution or polishing method can do that.
This is where caution enters the picture. Some ultrasonic cleaning solutions marketed for jewelry are slightly alkaline or contain surfactants that help with general cleaning but do almost nothing for tarnish. Other solutions are more reactive and can strip tarnish quickly. If a solution is too strong or poorly balanced for silver, combined with ultrasonic action, it can leave the metal blotchy or uneven. Silver is also soft, and ultrasonic vibration may expose micro-scratches or areas where tarnish was hiding wear.
There are specific situations where ultrasonic cleaning is not recommended for sterling silver:
- When the piece is heavily tarnished
- When the silver has an oxidized or intentionally darkened finish
- When jewelry contains fragile or porous gemstones
- When solder joints are old or compromised
- When the piece is antique or made with thin hollow construction
- When the solution contains chemicals incompatible with silver
If any of these conditions apply, ultrasonic cleaning may cause more harm than good. Tarnish removers designed for passive soaking can strip oxidized accent details from artisan pieces. Old solder joints may loosen under vibration. Hollow or lightweight silver can dent if vibrations expose weak points. And porous stones like turquoise, opals, pearls, emeralds, amber, or coral can be ruined instantly in an ultrasonic tank.
However, when the silver piece is sturdy, free of fragile stones, and only moderately dirty, ultrasonic cleaning can be a fast and effective method to restore brightness. Modern sterling silver jewelry designed for daily wear often responds beautifully to ultrasonic cleaning when done correctly. Jewelers routinely place silver rings, earrings, and pendants in their ultrasonic machines before polishing or after resizing. Many professional workflows combine ultrasonic cleaning with a steam cleaner to remove final residues.
It’s not that sterling silver is incompatible with ultrasonic cleaners—it’s that silver’s condition, construction, and surrounding components must be understood before the cleaning begins. A simple, solid silver ring with no stones is a perfect candidate. A vintage silver ring with a glued-in turquoise cabochon is not.
When Ultrasonic Cleaning Works Well for Sterling Silver
Ultrasonic cleaning can produce remarkable results when the conditions are right. Sterling silver is a versatile metal, and when the tarnish level is manageable and the construction of the piece is sound, an ultrasonic cleaner can refresh silver faster and more thoroughly than many traditional methods. The key is understanding the situations where ultrasonic cleaning is not only safe but genuinely advantageous.
One of the most noticeable benefits appears when sterling silver contains intricate details. Many silver items—antique-style rings, filigree pendants, sculpted charms, engraved bracelets, or decorative cutlery—have deep grooves where dirt, oils, and residue settle over time. Polishing cloths can brighten the surface but struggle to reach these recessed areas. Cavitation, however, thrives in such environments. The tiny bubbles travel into narrow channels and tight corners, lifting out debris that manual cleaning leaves behind. As a result, details that once looked dull or clogged suddenly appear crisp and defined again.
Ultrasonic cleaning also works well when sterling silver is coated in residues that are difficult to remove by hand. Sunscreen, hand lotion, soap film, cooking oils, beauty products, and natural skin oils accumulate on jewelry, especially pieces worn daily. These residues cling stubbornly to metal surfaces and can mask the shine even when the silver isn’t significantly tarnished. Ultrasonic vibration breaks apart these films at a microscopic level, causing them to detach from the silver and dissolve into the cleaning solution. Items emerge looking fresher even if the tarnish level was minimal.
Chain-style jewelry benefits tremendously from ultrasonic cleaning. Sterling silver chains—whether box, rope, snake, curb, or wheat-link designs—contain dozens or hundreds of interlocking segments. Dirt and sweat migrate into these joints over time and rarely wash out completely without assistance. Cavitation reaches into these tiny mechanical junctions and flushes contaminants out from between the links. This not only improves appearance but can restore fluid movement in chains that feel stiff or coated.
Sterling silver items with light or beginning-stage tarnish also respond well to ultrasonic cleaning when the correct silver-safe solution is used. Because tarnish forms unevenly, pieces often show a blend of darkened areas and dull patches. Ultrasonic cleaning, when combined with mild tarnish-dissolving chemistry, lifts the initial layer of oxidation gently. The result is a more even surface that is easier to polish afterward. Many jewelers use ultrasonic cleaning as a pre-polishing step: it removes surface grime and prepares the metal for a final buffing.
Another scenario where ultrasonic cleaning excels is when silver pieces contain hard, durable gemstones—provided the stones themselves are compatible with ultrasonics. Diamonds, sapphires, rubies, and cubic zirconia are typically safe in ultrasonic cleaners when properly mounted. These stones attract oils and microscopic debris around the edges of their settings, and ultrasonic cleaners restore their brilliance by removing these residues. When paired with sterling silver, the result is a complete refresh of both the metal and the gemstones.
Sterling silver cutlery and dining ware also benefit from ultrasonic cleaning. Light tarnish, fingerprints, and food residue are removed evenly, leaving utensils looking polished with minimal effort. For people who maintain silverware collections, ultrasonic cleaning can save hours of manual polishing.
Even more importantly, ultrasonic cleaning is often used in professional workshops as part of a combined cleaning workflow. Jewelers might first clean sterling silver ultrasonically to remove oils and dirt, then follow up with a buffing wheel or silver cloth to restore high polish. The ultrasonic step ensures contaminants are gone from the surface, allowing polishing compounds to work more efficiently. This workflow produces consistent, high-quality results that amateurs often struggle to achieve manually.
Ultrasonic cleaning also performs well when silver pieces are structurally sound. Solid rings, thick bracelets, stud earrings, and pendants without hollow construction tolerate ultrasonic vibration very well. As long as their stones are durable and securely set, they are ideal candidates for ultrasonic cleaning.
In all these situations, ultrasonic cleaning delivers something valuable: a deeper clean with less effort, especially in hard-to-reach areas. However, not every piece of sterling silver is a good candidate. Understanding the risks will help you determine when ultrasonic cleaning should be avoided.
Risks and Potential Problems to Watch For
Ultrasonic cleaning can be extremely effective, but it is not without risks, especially when it comes to sterling silver. The metal itself is relatively soft, and its alloy components, solder joints, gemstones, and surface treatments can all respond unpredictably to ultrasonic vibration and cleaning chemistry. Understanding these risks is essential before you place any valuable silver item into the tank.
One of the most overlooked risks is the acceleration of tarnish-related reactions. Ultrasonic cleaning does not remove tarnish by default, and if the cleaning solution is not designed for silver, it may actually highlight tarnished areas rather than diminish them. When cavitation removes surface dirt, it exposes deeper tarnish, causing the piece to look blotchy or uneven. In some cases, poorly formulated solutions can react with copper in the alloy and create new spots of discoloration.
Temperature also plays a major role in how sterling silver behaves. Ultrasonic cleaners often include heating elements to improve cleaning performance, but heat can worsen tarnish under the wrong conditions. Hot water accelerates chemical reactions between silver alloys and dissolved oxygen or sulfur compounds. When the temperature rises too high, sterling silver may develop faint yellow or rainbow-like patches that were not visible before cleaning. While these discolorations can be polished out later, they may cause unnecessary alarm to anyone unfamiliar with the process.
Another significant risk appears when silver jewelry incorporates fragile, porous, or heat-sensitive gemstones. Stones such as turquoise, opal, amber, pearl, coral, moonstone, emerald, and many others should never be placed in an ultrasonic cleaner. Their internal structures, adhesives, and water absorption properties make them extremely vulnerable to ultrasonic vibration. Porous stones can crack or absorb cleaning solution, while heat-sensitive stones may fracture. Even stones considered moderately durable can be damaged if they have inclusions or internal stress points.
Jewelry construction introduces additional risks. Many sterling silver pieces use solder to attach settings, filigree, or decorative components. Older solder joints or repairs performed with low-melting-point solder may weaken over time. Ultrasonic vibration can expose these weaknesses, causing stones to loosen or components to separate. Hollow jewelry presents a different challenge—vibration can dent thin walls, and trapped liquid may be difficult to remove afterward.
Certain finishes are also incompatible with ultrasonic cleaning. Blackened, oxidized, patinated, or intentionally darkened silver can lose its surface treatment during cleaning. Ultrasonic vibration, combined with mildly reactive solutions, may strip or soften these finishes, resulting in an uneven or patchy appearance. Antique silver with delicate patina or texture should generally be cleaned manually to preserve its character.
Residual chemicals on the silver can create unexpected problems as well. If the piece has been exposed to chlorine, sulfur-containing cosmetics, or harsh cleaning products, traces may linger in crevices or behind stones. Ultrasonic action can intensify their reaction with the silver alloy, creating new tarnish streaks or black spots. This is especially common with items worn while swimming, cooking, or showering.
Even when the silver itself is sturdy, the mountings and mechanisms may be sensitive. Spring-loaded earring hinges, tension settings, or clasp mechanisms can sometimes loosen or malfunction after prolonged ultrasonic exposure. The vibration can dislodge tiny particles or grit that help hold these mechanisms in place.
Finally, the cleaning solution itself matters. Many household cleaning liquids create foam, which disrupts cavitation and reduces cleaning effectiveness. Others contain chemicals incompatible with silver or gemstones. Using a solution that is too aggressive or improperly diluted can strip plating, react with alloys, and cause cosmetic or structural damage.
Despite these risks, many people safely use ultrasonic cleaners for sterling silver every day—when they know what they’re doing. The key is understanding what you are putting into the machine and under what conditions. With this in mind, it’s essential to look at the next major factor: the gemstones, settings, and mixed materials that may be attached to your silver jewelry.
Sterling Silver Jewelry with Gemstones: What’s Safe and What Isn’t
If sterling silver jewelry consisted only of metal, deciding whether it could go into an ultrasonic cleaner would be straightforward. But many silver pieces include gemstones—some durable, some delicate, some porous, and some held in place with adhesives or fragile settings. These additional materials play a much larger role in determining whether ultrasonic cleaning is safe than the silver itself.
Most jewelers consider gemstone evaluation the most critical step in deciding if ultrasonic cleaning is appropriate. Sterling silver can usually handle ultrasonic energy under the right conditions, but gem choice changes everything.
Hard, non-porous gemstones like diamonds, rubies, sapphires, and cubic zirconia are typically the safest. These stones withstand vibration well, and ultrasonic cleaning can bring back their brilliance by removing oils and microscopic debris trapped in their faceting or around their settings. When set in sterling silver, these pieces often come out looking dramatically brighter because both the stone and the surrounding metal benefit from the cleaning.
However, even hard stones can be vulnerable under certain conditions. Diamonds with internal fractures, inclusions, laser-drilled channels, or fracture-filled treatments may crack when exposed to vibration. Sapphires and rubies with fracture fillings or glass-infused repairs are similarly at risk. Ultrasonic cleaners do not differentiate between strong and weakened areas inside a gemstone—they apply uniform energy, which can exploit any internal weaknesses.
Soft or porous gemstones should never be cleaned ultrasonically. Turquoise, opal, emerald, pearl, amber, coral, moonstone, malachite, onyx, and many other stones can be irreparably damaged. Their porous structures absorb liquids, and the rapid pressure changes inside the ultrasonic tank can cause internal cracking. Heat is also a major issue. Ultrasonic cleaners warm the water during operation, and many of these sensitive stones cannot tolerate sudden temperature changes.
Emeralds are a special concern. Most emeralds on the market are fracture-filled with oils or resins to improve clarity. Ultrasonic cleaning can remove or disturb these fillings, causing the stone to appear cloudy, fissured, or visibly altered. The same risk applies to opals, which contain water within their mineral structure. The vibration and heat of the ultrasonic cleaner can dry them out, fracturing the stone or causing it to lose its color play.
In addition to gemstone fragility, the way gemstones are mounted matters. Some sterling silver pieces use glue instead of prongs to secure stones. This is especially common with low-cost jewelry, cabochon settings, and stones without drill holes. Ultrasonic vibration quickly weakens adhesives and can cause stones to fall out. Even well-secured stones may loosen if the setting is old or worn.
Pieces with pavé or micro-pavé settings—small stones set closely together—are also at risk. The tiny beads that hold these stones in place can loosen under vibration, especially if the piece has been worn extensively or if the craftsmanship was not strong originally. Losing multiple stones in an ultrasonic tank is not uncommon when pavé jewelry is cleaned without proper inspection.
The structure of the silver itself also affects gemstone safety. If the sterling silver piece is hollow, thin, or has hollow-backed settings, ultrasonic vibration can cause internal rattling or stress. This, in turn, can affect the stability of the stones, especially in earrings and pendants.
Mixed-material jewelry adds another layer of complexity. Pieces that combine sterling silver with enamel, resin, wood, leather, shell, or glass inlays are rarely suitable for ultrasonic cleaning. These materials expand and contract differently when exposed to heat and vibration. Ultrasonic energy may cause the bond between the materials to weaken or break entirely.
When evaluating sterling silver with gemstones for ultrasonic cleaning, jewelers use a simple guiding principle: the gemstone and its mounting determine whether ultrasonic cleaning is safe, not the silver. Even if the silver is sturdy and free from heavy tarnish, the slightest vulnerability in the stone or setting makes ultrasonic cleaning a bad idea.
Understanding gemstone compatibility provides a clear foundation for choosing an appropriate cleaning solution. The next important step is selecting the right cleaning fluid for sterling silver to prevent damage and ensure the best possible result.
Choosing the Right Solution for Cleaning Sterling Silver
The cleaning solution inside an ultrasonic tank has as much impact on the outcome as the machine itself. Sterling silver responds differently depending on the chemistry present, and using the wrong solution can lead to discoloration, uneven cleaning, or even permanent surface changes. Choosing the right formula ensures effective cleaning while protecting the metal’s integrity and preserving any decorative finishes.
One of the most important principles to remember is that plain water alone is rarely enough. Water can transmit ultrasonic waves and lift away loose debris, but it does very little to dissolve oils, fingerprints, skin residue, or the light tarnish that builds up during daily wear. Without the ability to break down these contaminants chemically, cavitation cannot fully detach them from the silver’s surface.
However, not every cleaning solution is appropriate for sterling silver. Some household soaps contain chlorides, sulfur compounds, or ammonia, all of which can react with silver alloys. Others create excessive foam that interferes with cavitation and reduces cleaning effectiveness. Even gentle dishwashing liquids, which seem harmless, can promote uneven spotting or leave behind films that dull silver.
The safest and most effective choice is a silver-safe ultrasonic cleaning solution. These formulas are designed to balance cleaning power with metal protection. They contain mild surfactants that lift oils and dirt, wetting agents that help cavitation reach deeply into crevices, and corrosion inhibitors that prevent silver from reacting with dissolved oxygen or chemical residues. These solutions are usually neutral or slightly alkaline, creating an environment that cleans efficiently without destabilizing the silver’s surface.
When tarnish removal is the primary goal, some people turn to strong chemical dips. These dips contain thiourea or other sulfur-reactive chemicals that dissolve tarnish rapidly. While effective for short applications, they are generally unsuitable for ultrasonic use. Ultrasonic energy can accelerate the chemical reaction in unpredictable ways, stripping silver too aggressively or creating patchy results. Even worse, these chemicals may damage solder joints or react poorly with gemstones.
Mild tarnish removers formulated specifically for ultrasonic cleaners provide a safer alternative. These solutions dissolve light silver sulfide and copper oxide without attacking the underlying metal. They work slowly and evenly, reducing the risk of over-brightening or uneven stripping. For jewelry with patinated or intentionally oxidized accents, however, even these mild formulas may cause changes in coloration, so they must be selected with care.
Temperature also affects how silver interacts with cleaning solutions. Most silver-safe solutions perform best between 30°C and 45°C. At these temperatures, surfactants work efficiently, oils dissolve quickly, and cavitation remains strong. Temperatures above 50°C may accelerate tarnish reactions or cause yellowish discoloration on silver surfaces. When in doubt, it’s better to start with cooler water and increase the temperature only if needed.
The concentration of the cleaning solution also matters. Using too little reduces cleaning power, causing the ultrasonic cleaner to work harder without producing the desired results. Using too much can create instability in the solution, leading to streaking, residue, or unwanted chemical reactions with the silver alloy. Manufacturers typically provide dilution ratios, and following them closely helps maintain a safe and effective cleaning environment.
In some cases, people attempt to clean sterling silver with homemade solutions involving baking soda, salt, or vinegar. These ingredients may work for passive cleaning, but they do not perform well in ultrasonic tanks. Saltwater solutions can promote corrosion under ultrasonic vibration, and baking soda does not dissolve effectively enough to assist cavitation. Vinegar can react aggressively with copper in the alloy, especially when agitated by ultrasonic energy.
The best formula for ultrasonic cleaning sterling silver is one designed specifically for silver or fine jewelry. These solutions protect the metal, enhance cavitation, and dissolve the types of residue that sterling silver commonly accumulates.
With the right solution selected, the next step is learning how to use the ultrasonic cleaner properly to ensure the silver comes out looking bright, clean, and undamaged.
Step-by-Step Guide: How to Clean Sterling Silver in an Ultrasonic Cleaner
Cleaning sterling silver in an ultrasonic cleaner can be straightforward when the correct steps are followed. The key is to prepare properly, choose the right solution, use the right temperature, and allow the machine to work without overexposing the silver to unnecessary cycles. A careful approach restores shine while protecting the metal and any mounted components.
Before anything else, take a close look at the piece you plan to clean. Examine it under good lighting to check for loose stones, cracked settings, weakened solder joints, or areas that appear unusually dark. Sterling silver should be structurally sound before it enters an ultrasonic tank. If you have any doubts about the stability of a stone or the condition of a repair, it is safer to clean the piece manually. An ultrasonic cleaner does not cause damage on its own, but it can reveal or amplify issues that already exist.
Once you confirm that the jewelry or silverware is stable, prepare your ultrasonic bath. Fill the tank with fresh water, ensuring that the water level is high enough to cover the item completely but not so high that it risks overflowing when the machine is activated. Add the appropriate amount of silver-safe ultrasonic cleaning solution. The exact dilution ratio varies by manufacturer, but most solutions require only a small amount mixed thoroughly into the water. Stir gently to distribute the solution evenly and minimize trapped air bubbles.
Many ultrasonic cleaners perform best when the water is warmed. For sterling silver, a temperature between 30°C and 40°C offers a reliable balance. At this warmth, surfactants activate more effectively and dirt dissolves quickly, but the risk of overreaction or discoloration remains low. If your ultrasonic cleaner has a built-in heating element, allow it to reach the target temperature before placing your silver inside. If it does not, pre-warming the water in a separate container before filling the tank is an acceptable alternative.
Before running the cleaning cycle, place your sterling silver into a basket or tray rather than directly inside the tank. Direct contact with the metal tank can create vibration hotspots that may scratch or mar the surface. A mesh basket or plastic tray keeps the silver suspended safely while still allowing cavitation to reach all sides. Avoid overcrowding the basket. Items should not knock into each other during cleaning, as ultrasonic vibration can cause them to tap lightly against one another, leaving small marks.
When everything is ready, lower the basket into the tank and activate the machine. Ultrasonic cleaning cycles vary widely depending on the unit’s power and the level of residue on the silver, but most sterling silver requires only three to seven minutes. Longer cycles offer diminishing returns and may increase the risk of revealing tarnish patterns unevenly. The goal is to loosen and remove grime, not to strip silver or expose underlying alloy layers.
As the machine runs, you may notice a slight shimmer or agitation on the water’s surface. This indicates that cavitation is occurring properly. If excessive foam forms, stop the cycle and reduce the concentration of your cleaning solution. Foam interferes with cavitation and reduces cleaning efficiency.
When the cycle finishes, lift the basket out of the tank and rinse the items thoroughly with clean water. Rinsing is essential because it removes any cleaning solution residue and prevents spotting. Use lukewarm water rather than cold, as sudden temperature changes can stress some jewelry components. After rinsing, inspect the silver under bright light. You should see a noticeable improvement in brightness and clarity, especially around detailed areas and between chain links.
Drying the silver correctly is as important as cleaning it. Use a soft, lint-free cloth to pat the surface dry. Avoid rubbing aggressively, which can leave micro-scratches. For chain jewelry or pieces with crevices, use compressed air or a hairdryer on a cool setting to ensure all moisture is removed. Any leftover water trapped behind stones or inside hollow sections may cause spotting or corrosion over time.
If the sterling silver still shows tarnish after ultrasonic cleaning, a gentle silver polishing cloth can finish the job. The ultrasonic cleaner will have already removed oils and debris, giving you a smooth, clean surface for polishing. This two-step process—ultrasonic cleaning followed by hand polishing—is a common technique among professional jewelers because it produces the brightest results.
Once your silver is clean and dry, proper storage helps preserve the shine. Anti-tarnish pouches, airtight containers, or soft flannel bags reduce exposure to air and moisture. Keeping pieces separate prevents scratches and slows the return of tarnish.
While the ultrasonic cleaning process is effective, it is not always appropriate. Some situations demand alternative cleaning methods to avoid damage. Understanding when ultrasonic cleaning should be avoided ensures you make the best choice for the long-term health of your sterling silver.
When You Should Avoid Ultrasonic Cleaning for Silver
Ultrasonic cleaning can be a powerful tool for revitalizing sterling silver, but it is not the right solution in every situation. Certain pieces, materials, and conditions make ultrasonic cleaning risky, unpredictable, or even damaging. Understanding when to avoid the ultrasonic tank is an essential part of caring for silver properly.
The first and most common reason to avoid ultrasonic cleaning is heavy or severe tarnish. Ultrasonic cleaners are excellent for removing dirt, oils, and debris, but they are not designed to reverse deep chemical oxidation. When a piece of silver has thick tarnish or black patches, the ultrasonic cleaner cannot dissolve the tarnish layer by itself. Instead, it removes surface grime, making the tarnished areas appear more obvious and sometimes emphasizing uneven coloration. In cases of heavy tarnish, manual polishing or a specialized silver dip designed for controlled tarnish removal is usually a better starting point.
Ultrasonic cleaning is also unsuitable for sterling silver pieces with intentional oxidation or patina. Many artisans apply darkened finishes to create contrast or highlight engraved details. Ultrasonic cleaning, combined with even a mild cleaning solution, can strip or soften these decorative treatments. Over time, this can make the piece look washed out or inconsistent. If the silver was designed to have a darkened look, it should be cleaned by hand to preserve the artist’s original finish.
Antique silver requires special caution as well. Many older pieces have unique surface textures, thin metal walls, or delicate solder joints that can weaken over time. Vibration from ultrasonic cleaning can expose these weaknesses. Antique jewelry with hand-carved details or filigree work may contain dirt and tarnish embedded deep within the structure. While ultrasonic cleaning may seem like a fast solution, it risks loosening delicate parts or revealing deep tarnish patterns that are difficult to correct afterward.
Sterling silver pieces with hollow construction are another category to avoid. Hollow bangles, pendants, earrings, and beads often have thin walls or sealed pockets of space. Ultrasonic vibration can distort the metal, create dents, or cause structural weaknesses to become visible. In some cases, water can become trapped inside the hollow area and is nearly impossible to remove fully. Trapped moisture leads to internal corrosion, which damages the piece over time.
Silver jewelry connected to heat-sensitive materials should never enter an ultrasonic cleaner. This includes enamel, resin, wood, leather, adhesives, lacquer, painted surfaces, or any jewelry containing organic materials. Ultrasonic vibration and mild heat cause expansion and contraction that can crack or separate these materials. Even more durable inlays, such as shell or mother-of-pearl, may loosen because the adhesives holding them in place are not meant to withstand continuous vibration.
Sterling silver jewelry with porous or delicate gemstones is also a strong no. Stones such as opal, turquoise, emerald, amber, coral, malachite, howlite, and moonstone can crack, discolor, or disintegrate in an ultrasonic cleaner. Their internal structures are too fragile for the pressure changes inside the tank. Even gemstones considered “safe” may become risky if they contain inclusions, treatments, or structural irregularities.
Some sterling silver pieces contain glued-in stones, which is common in fashion jewelry and less expensive designs. These stones may be secure during normal wear but can loosen or detach entirely inside an ultrasonic cleaner. The vibration weakens adhesives, especially older glues or glue exposed to heat. If a gemstone falls out inside the tank, it can be damaged when it rattles against the basket or other jewelry.
Finally, ultrasonic cleaning should be avoided if the silver piece has loose stones or visibly weak settings. If a prong, bezel, or channel setting is compromised, ultrasonic vibration will likely expose the problem. Jewelers often inspect and tighten settings before using an ultrasonic machine to prevent stones from falling out.
Knowing when not to use ultrasonic cleaning is just as important as knowing when it works well. Fortunately, sterling silver can be cleaned effectively using a variety of alternative methods that offer more control and less risk. To decide which method fits best, it helps to compare ultrasonic cleaning with other common silver-cleaning techniques.
Comparing Ultrasonic Cleaning to Other Silver Cleaning Methods
Ultrasonic cleaning is only one approach to maintaining sterling silver, and while it offers many advantages, it is not always the best or safest option. Sterling silver responds differently to various cleaning methods, and each technique has unique strengths and limitations. Understanding how ultrasonic cleaning compares to other methods will help you choose the approach that delivers the best results for your specific item.
One of the most traditional ways to clean sterling silver is by using a polishing cloth. These soft, treated cloths remove tarnish and restore shine through gentle friction. Polishing cloths work well for solid silver surfaces, especially when tarnish is light or moderate. They are safe, simple, and effective, but they have limitations. Cloths cannot reach into tight spaces, engraved lines, or complex chain links. They also remove tiny amounts of silver when used aggressively, which is problematic for antique pieces or jewelry with plating. Daily polishing can keep silver looking bright, but it often struggles with deep, uneven tarnish or heavily textured surfaces.
Chemical silver dips offer another popular method. These dips dissolve tarnish by chemically reducing the silver sulfide layer on the surface. They work quickly, often within seconds, and can make extremely tarnished pieces look nearly new. However, dips do not clean dirt, oils, or residues. They simply remove tarnish and leave behind a very bright, sometimes overly intense shine. Silver dips must be used carefully because they may strip patinas, remove intentional oxidization, and create streaks if the piece is rinsed unevenly. They also work best when the item is made entirely of silver, without gemstones or mixed materials. Ultrasonic cleaning cleans dirt, while dips remove tarnish; the two methods can complement each other when used properly.
Another widely known cleaning method is the baking soda and aluminum foil technique, which reverses tarnish through an electrochemical reaction. This method can be effective for items with uniform tarnish, but it often struggles with complex shapes and heavy oxidation. It may also leave a matte finish rather than a polished shine. While this method is gentle on silver, it tends to be less reliable for detailed jewelry or items with stones. Ultrasonic cleaning excels in these situations because it penetrates crevices and removes embedded debris.
Silver creams and pastes provide a more controlled tarnish removal process. They work through gentle abrasives and are excellent for restoring a high shine. Creams are ideal for solid metal pieces, flatware, and decorative silverware. The drawback is the effort required and the inability of creams to reach hidden areas. They also require careful buffing to avoid micro-scratches, especially on high-polish silver. In comparison, ultrasonic cleaning requires no friction, making it a more hands-off method for complicated or delicate shapes.
For professional settings, steam cleaning is another method used to restore silver jewelry. Steam cleaners blast away surface dirt, oil, and polishing compounds using high-pressure steam. They are perfect for giving jewelry a streak-free shine. However, steam cleaning does not remove tarnish and is typically used only after polishing or ultrasonic cleaning. Jewelers frequently clean a piece ultrasonically first, then steam it for a final, sparkling finish. In this workflow, ultrasonic cleaning is valued for its ability to reach areas that steam cannot.
Some jewelers use vibratory tumblers with polishing media for silver items like rings or chains. These machines use motion and media to polish metal surfaces. While highly effective in some cases, tumblers can remove metal over time and may damage intricate details. Ultrasonic cleaners are gentler and do not wear down the surface through abrasion.
Manual washing with mild soap and water is suitable for lightly soiled silver but often leaves residues behind. It cannot address tarnish or deep grime and serves more as a maintenance method between deeper cleanings. Ultrasonic cleaning surpasses soap-and-water washing by delivering a far deeper, more even clean.
When comparing all these methods, ultrasonic cleaning stands out for its ability to:
- Reach inaccessible grooves and tight spaces
- Remove oils and residue without abrasion
- Clean complex chains, engravings, and filigree
- Work quickly with minimal manual effort
However, it cannot remove heavy tarnish and must be used cautiously with gemstones, adhesives, and fragile constructions.
Understanding how ultrasonic cleaning fits among other methods helps you choose the best approach for each piece of sterling silver you encounter. The next section explores how jewelers themselves use ultrasonic cleaners and why they sometimes avoid them.
Professional Jeweler Insights: When Experts Use Ultrasonic Cleaners for Silver
Professional jewelers rely on ultrasonic cleaners every day, but they use them with intention and caution—especially when sterling silver is involved. Their approach is informed by years of hands-on experience, pattern recognition, and an understanding of how materials behave under both chemical and mechanical stress. Watching how jewelers make their decisions offers valuable insight into when ultrasonic cleaning is truly appropriate for silver and when it should be avoided.
Most jewelers use ultrasonic cleaning as part of a multi-step workflow. They rarely rely on the ultrasonic cleaner as the only cleaning method. Instead, they treat it as a preparatory step. After performing repairs, resizing rings, soldering components, or polishing metal on a buffing wheel, jewelers place silver pieces in the ultrasonic tank to remove polishing compounds, buffing residues, metal dust, and oils. These contaminants settle deeply into grooves and around settings, making ultrasonic cleaning particularly effective.
Sterling silver jewelry often benefits from this professional approach because buffing compounds cling stubbornly to engraved patterns and filigree work. Ultrasonic cavitation breaks up these residues far more efficiently than manual brushing. Jewelers typically follow ultrasonic cleaning with steam cleaning to blow away loosened particles and leave the piece with a crisp, bright finish.
Yet, despite having access to ultrasonic cleaners, many jewelers avoid using them on certain sterling silver pieces. Experience teaches them quickly that not all silver jewelry is created equal. Jewelers will often inspect a piece meticulously before deciding whether it belongs in the tank. If they detect weak prongs, loosened stones, brittle solder joints, or repaired areas, they will clean the jewelry by hand instead. The ultrasonic cleaner is powerful enough to exploit these weaknesses, and losing a stone in the tank is a problem no jeweler wants to deal with—especially with valuable gemstones.
Another key insight from professionals is the importance of stone type and setting integrity. Jewelers are trained to identify gemstones on sight. They can distinguish between a sapphire and a treated sapphire, between a natural emerald and a fracture-filled one, or between an opal and a synthetic opal doublet that uses adhesive layers. This knowledge guides their cleaning choices. If a stone is deemed unsafe for ultrasonics, the entire piece is cleaned manually regardless of how safe the sterling silver itself might be.
Jewelers also pay attention to the type of finish on the silver. If the piece has an antiqued or oxidized look, they avoid ultrasonic cleaning in favor of gentle surface cleaning to preserve the design. They know ultrasonic cleaning can strip away patinas unevenly, leaving the silver looking flat or distorted.
In many jewelry shops, ultrasonic cleaners are also used as diagnostic tools. A jeweler may place a piece in the ultrasonic tank briefly to see if any stones or settings loosen. While this may seem counterintuitive, it is better for a stone to fall out in a controlled environment than while a customer is wearing the jewelry. If something loosens in the tank, the jeweler can fix it immediately, restoring the structural integrity of the piece.
Professional jewelers seldom use strong chemical dips in ultrasonic machines. They prefer mild, silver-safe solutions because dips can react unpredictably under ultrasonic vibration. Their approach emphasizes safety and control. They know that aggressive solutions combined with ultrasonic agitation may strip too much metal or damage the alloy.
Another important insight is that jewelers rarely use ultrasonics for heavily tarnished silver. Instead, they polish the piece first using polishing compounds or specialized wheels. Ultrasonic cleaning then becomes the finishing step, removing any debris the polishing process leaves behind. This sequence produces a more uniform shine and avoids the risk of exposing uneven tarnish patches during ultrasonic cleaning.
Finally, jewelers understand the value of routine preventive care. They advise customers to store silver properly, avoid corrosive chemicals, and clean pieces regularly to prevent heavy tarnish buildup. When silver is maintained well, ultrasonic cleaning becomes safer and more predictable.
Observing how professionals use ultrasonic cleaners underscores a consistent theme: ultrasonic cleaning is most effective when used thoughtfully, not automatically. Understanding the piece, the materials, and the risks leads to better outcomes.
Maintaining Sterling Silver After Cleaning
Cleaning sterling silver is only half the journey. The way you maintain the metal after it leaves the ultrasonic tank—or after any cleaning method—plays an equally important role in keeping it bright, reflective, and tarnish-free for as long as possible. Sterling silver interacts constantly with the environment, and its copper content makes it especially reactive. Without the right post-cleaning care, tarnish begins forming again almost immediately.
One of the simplest but most effective habits is drying your sterling silver completely after cleaning. Water droplets left on the surface can leave mineral spots, and moisture trapped in crevices accelerates oxidation. Gently pat the piece dry using a soft microfiber or jewelry cloth. Avoid rubbing aggressively, which can cause fine scratches, especially on high-polish finishes. For chain jewelry or intricate pieces, compressed air or a low-heat hairdryer helps remove moisture from hard-to-reach areas.
Once dry, storing silver correctly is the next major factor. Exposure to air is what causes tarnish, so limiting airflow around the piece slows oxidation. Airtight bags or containers are excellent options. Anti-tarnish strips, pouches, and cloths help absorb sulfur compounds and maintain a low-oxidation environment. Keeping each piece separate prevents scratches from friction between items and reduces the spread of tarnish from one piece to another.
Wear habits also matter. Although it may surprise some people, wearing sterling silver regularly actually helps prevent tarnish, because gentle friction from clothing and skin keeps the surface polished. However, the environments you wear it in matter. Humidity, sweat, chlorine, hairspray, lotions, sunscreen, and perfumes all accelerate tarnish formation. Removing silver jewelry before swimming, showering, exercising, or applying beauty products dramatically reduces the frequency of cleaning needed.
When silver begins to show early signs of dullness, addressing them promptly keeps the metal looking brighter for longer. A quick wipe with a silver polishing cloth removes early oxidation before it deepens into darker tarnish. This simple step can extend the time between deeper cleanings. Pieces with intricate designs or recesses may still benefit from periodic ultrasonic cleaning, but catching tarnish early means those cycles can remain gentle and short, reducing wear on solder joints and settings.
Maintaining sterling silver also means recognizing when it needs more specialized attention. Jewelry with stones should be inspected regularly to ensure settings remain secure. Loose prongs or weakened bezels can be repaired by a jeweler before they become problems. If a piece has an intentional patina or oxidized finish, preserving the design requires using non-abrasive cleaning methods and avoiding chemicals that might strip the coloration.
For silverware, tea sets, and decorative household items, handling habits make a difference too. Oils from your hands can leave residues, especially on high-polish surfaces. Using soft cotton gloves when handling fine silver items reduces fingerprints and slows tarnish formation. Display pieces benefit from regular dusting, a controlled humidity environment, and storage that limits exposure to sulfur-rich materials such as felt, wool, or certain papers.
If you want to maintain the shine of sterling silver over long periods, creating a routine helps tremendously. A combination of careful handling, proper storage, occasional polishing, and mindful ultrasonic cleaning ensures that the metal retains its brilliance without requiring harsh chemicals or abrasive polishing. The more consistently you maintain silver, the less intense each cleaning session needs to be.
With all these factors working together—from how silver is stored to how often it’s polished—sterling silver can remain radiant for years, even decades. The key is understanding how silver behaves, how tarnish forms, and how each cleaning method affects the metal. Armed with that knowledge, ultrasonic cleaning becomes just one part of a broader, smarter approach to silver care.
Final Thoughts: Should You Use an Ultrasonic Cleaner for Sterling Silver?
Sterling silver is a versatile, beautiful metal, but it requires thoughtful care to keep it looking its best. Ultrasonic cleaners offer a powerful, modern way to restore the crisp brightness of silver jewelry, chains, rings, and other detailed pieces without heavy manual polishing. When used correctly, they remove grime, oils, and residues that build up over time, leaving the silver noticeably cleaner with very little effort. For well-made silver pieces that contain durable gemstones or no stones at all, ultrasonic cleaning can be a reliable and efficient option.
Yet the decision to use an ultrasonic cleaner should never be automatic. Sterling silver comes in many forms, from sturdy modern rings to delicate antique filigree, and each piece responds differently to ultrasonic energy. Understanding the metal’s alloy structure, its tarnish behavior, and the sometimes fragile construction of jewelry settings makes a tremendous difference in choosing the right approach. The presence of soft, porous, or heat-sensitive gemstones immediately shifts the equation, often making manual cleaning the safer route. Likewise, silver with heavy tarnish, intentional patina, or hollow construction is better cared for through more traditional methods.
Ultrasonic cleaners perform best when they are part of a balanced cleaning strategy. They shine when removing dirt and buildup from complex shapes, chain links, engraved surfaces, and intricate designs. They work beautifully as a pre-cleaning step for jewelry that will later receive a final polish or steam cleaning. They are invaluable for restoring clarity to pieces dulled by lotions, oils, and everyday use. But they are not designed to replace tarnish removal entirely, nor can they compensate for weak settings, glued-in stones, or fragile components.
Sterling silver remains at its best when its care is shaped by observation and intention. Before placing any piece into an ultrasonic cleaner, take a moment to assess its condition, stone type, construction, and purpose. When you match the cleaning method to the needs of the piece, the results are consistently safer, brighter, and more satisfying. And when ultrasonic cleaning is used selectively and wisely, it becomes a powerful ally in preserving the shine and lifespan of your sterling silver.
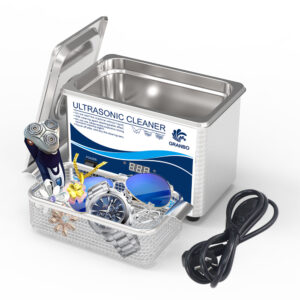
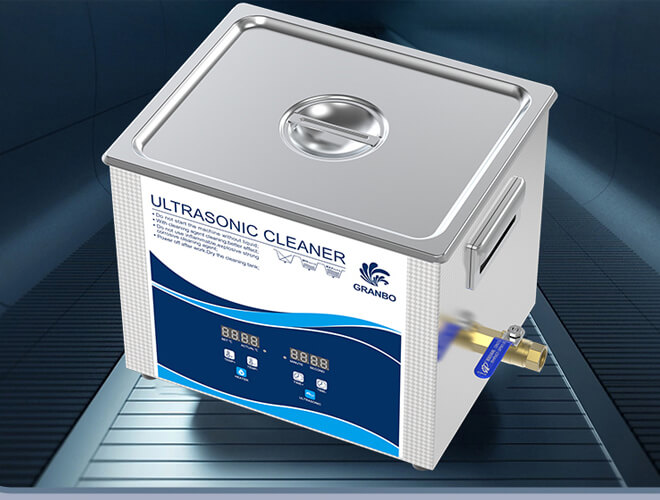
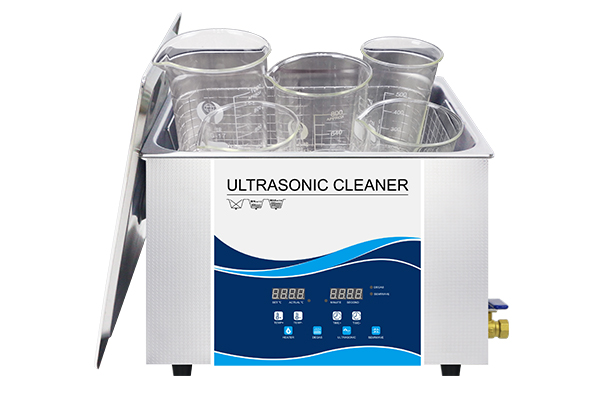
Explore Our Best-Selling Ultrasonic Cleaners
-
 Household
UV Ultrasonic Cleaner – 360° Deep Cleaning for Dentures, Jewelry & Household Use, with UV Light & 48kHz Frequency, 3 Modes
ClearGC01MGC01UGC01BMGC01BU -
-
-