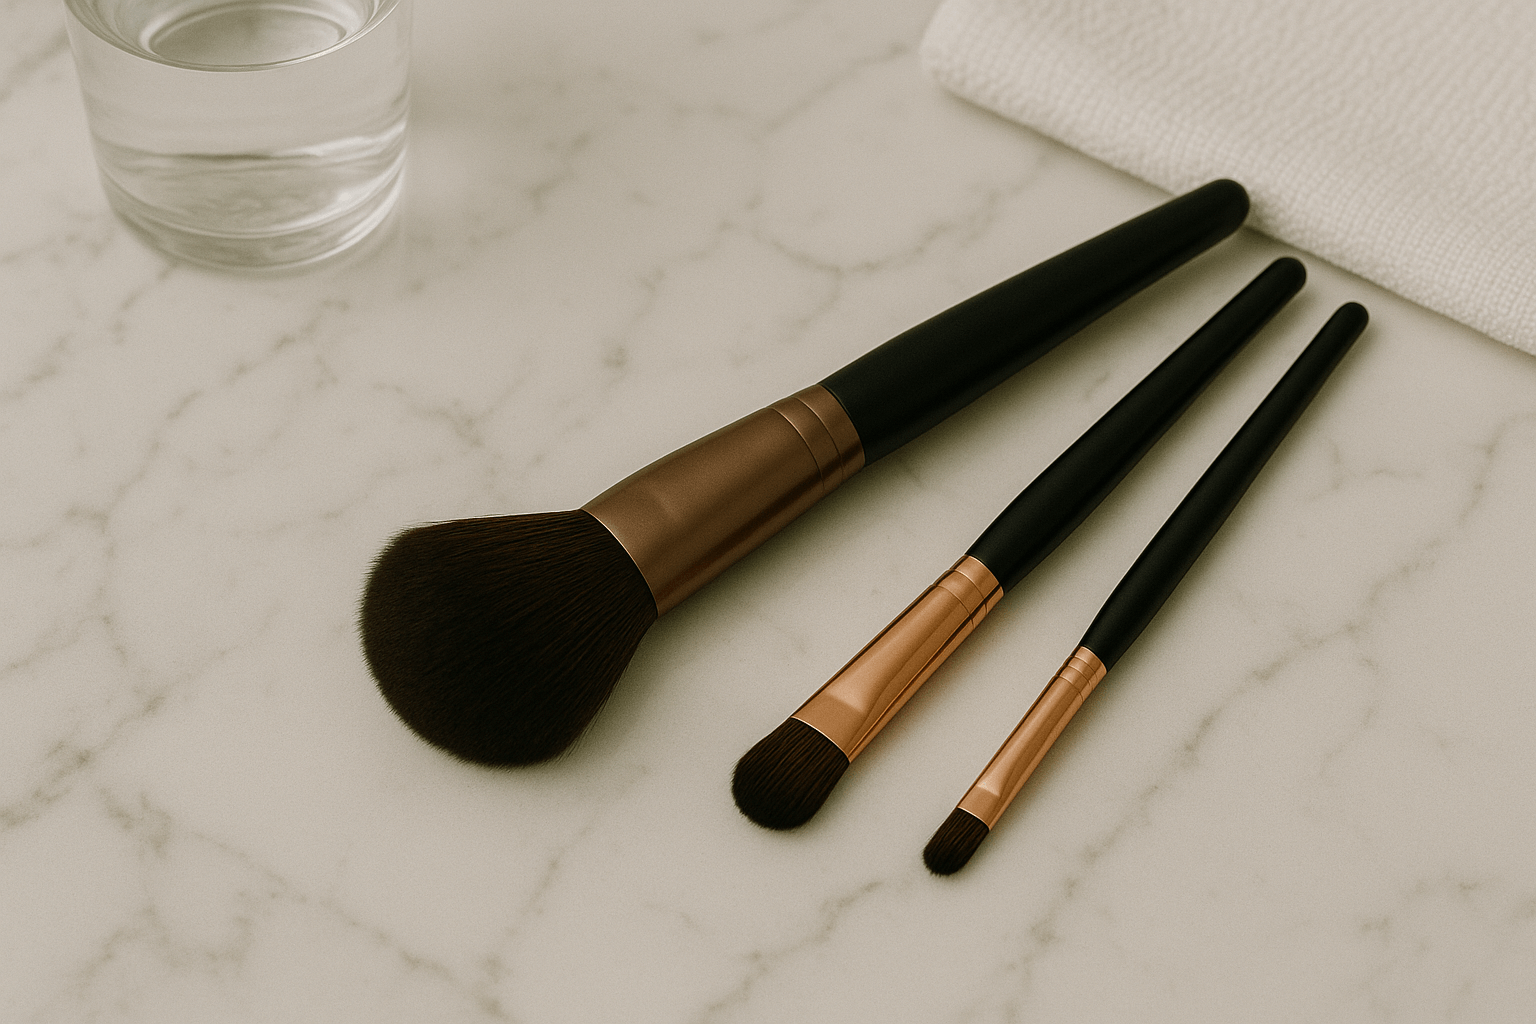
Makeup brushes are more than just tools—they’re daily companions in skincare and self-expression. But as they pick up product after product, day after day, they slowly become a breeding ground for bacteria, oils, and invisible debris. If you’ve ever struggled with skin irritation, patchy makeup application, or that musty smell lingering in your bristles, it might not be your cosmetics at fault—it could be your brushes.

What Builds Up in Makeup Brushes Over Time
Every time you dip a brush into foundation, blush, eyeshadow, or powder, tiny particles of product settle deep into the bristles. But it doesn’t stop there. Skin oils, sweat, dead skin cells, and airborne pollutants also cling to the fibers. These residues accumulate gradually, forming a sticky mixture that not only changes the way your brushes perform but also creates an environment where bacteria and mold can thrive.
The warmth and humidity of a bathroom or vanity space only make things worse. Over time, what looks like a fluffy tool on the outside may be harboring a swamp of skin-damaging microbes beneath the surface.
The Impact of Dirty Brushes on Skin and Makeup Application
Most people focus on product performance when their foundation starts streaking or their blending becomes uneven. But dirty brushes are often the real culprits. When bristles are coated in residue, they lose their flexibility and softness, dragging rather than buffing product across your skin.
Even worse, these contaminants can contribute to:
- Breakouts and clogged pores
- Redness or allergic reactions
- Eye infections from contaminated eye brushes
- Premature aging caused by inflammation and irritants
The impact isn’t just cosmetic—it’s dermatological. Using a dirty brush repeatedly is like applying makeup with a sponge dipped in week-old leftovers. It’s not just unsanitary; it’s counterproductive.
The Limitations of Traditional Brush Cleaning Methods
Most makeup lovers know they should clean their brushes regularly—but few actually do. Why? Because traditional cleaning is a chore. The usual method involves wetting the brush, massaging it with a cleanser or baby shampoo, rinsing, and waiting hours for it to dry. It’s time-consuming, messy, and easy to get wrong.
Even when done properly, manual cleaning struggles to remove everything from deep inside the bristles—especially with dense foundation brushes or angled contour tools. What looks clean on the surface may still hide gunk inside.
That’s where ultrasonic cleaners start to appeal—not as a luxury, but as a practical alternative that cleans deeper, faster, and more consistently.
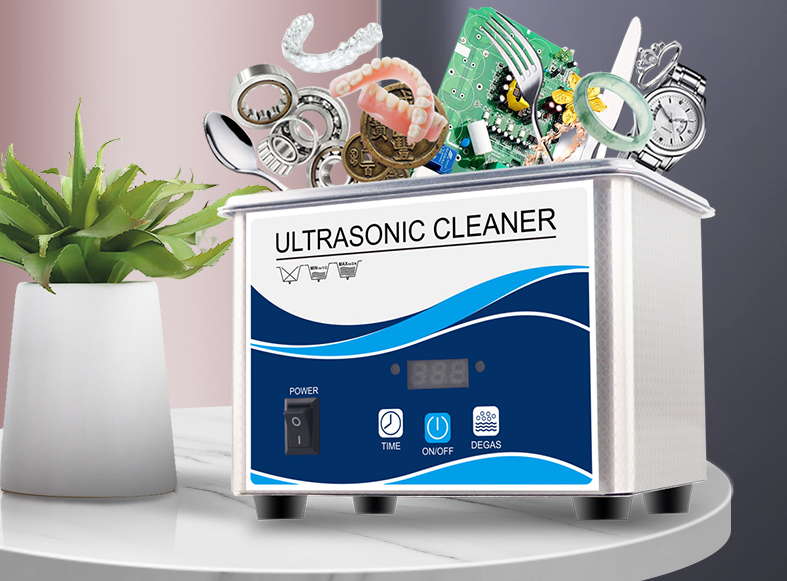
What Is Ultrasonic Cleaning and How Does It Work?
Before diving into whether ultrasonic cleaners are good for makeup brushes, it helps to understand what they are and how they work. While they’re commonly used in jewelry shops, dental offices, and laboratories, more beauty professionals and at-home users are discovering their value in cosmetic care.
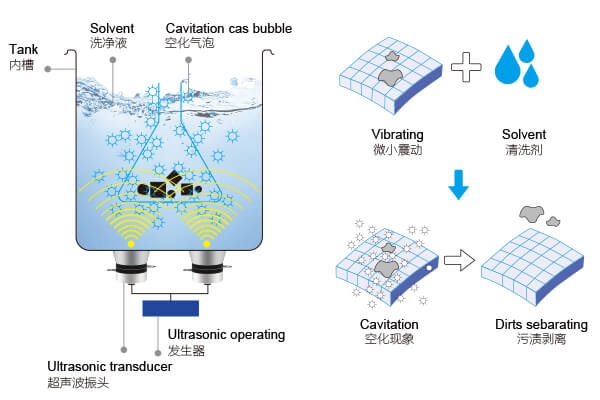
The Science Behind Cavitation
Ultrasonic cleaning works through a process called cavitation. When high-frequency sound waves (usually around 40kHz) are passed through a liquid—typically water or a mild solution—they create tiny vacuum bubbles. These bubbles rapidly form and collapse, releasing small bursts of energy.
This process happens thousands of times per second and reaches every part of the item submerged in the cleaning solution. Instead of relying on scrubbing or chemicals, the cavitation effect gently but powerfully dislodges dirt, oil, and residue from every surface and crevice.
The beauty of ultrasonic cleaning lies in its ability to clean thoroughly without mechanical abrasion. That’s what makes it attractive for items that are hard to clean or easy to damage—like makeup brushes.
How Ultrasonic Waves Reach Where Hands Cannot
Makeup brushes, particularly those with dense synthetic or natural bristles, trap debris deep inside. No matter how carefully you wash them by hand, it’s hard to reach the center without harsh rubbing, twisting, or pulling—which can damage the shape and loosen the glue that holds the bristles in place.
Ultrasonic waves reach these hidden areas effortlessly. Once a brush is placed in the tank, the liquid and sound waves penetrate the core of the bristle bundle, loosening even the most stubborn product build-up. The process doesn’t require pressure, scrubbing, or twisting—just time, vibration, and the right solution.
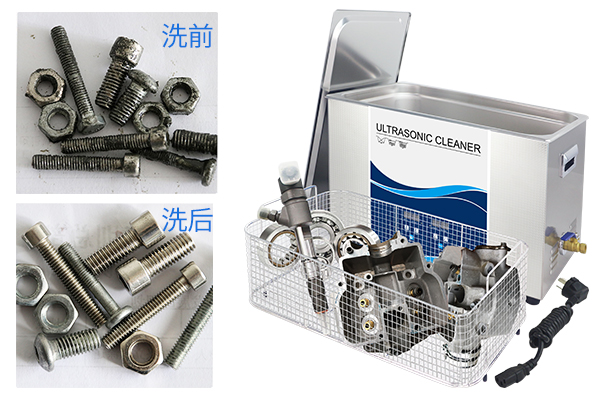
This makes it an ideal technique for:
- Flat-topped foundation brushes clogged with cream makeup
- Blending sponges with internal pigment stains
- Fan brushes with splayed fibers that resist manual rinsing
- Professional kits with 10+ brushes to clean at once
Why This Matters for Makeup Brushes
The difference between a brush cleaned manually and one cleaned ultrasonically is often visible—cleaner bristles, brighter color, restored softness, and better performance. But beyond appearances, the ultrasonic method also helps maintain the health of your tools over time. It’s gentler on bristle integrity, reduces the chance of pulling or glue erosion, and offers a consistent clean every time.
It also saves time. A proper hand wash and dry can take several hours. An ultrasonic cleaner? Five to ten minutes for the full cycle, plus a fraction of the drying time thanks to reduced water saturation.
Can You Clean Makeup Brushes in an Ultrasonic Cleaner?
The short answer is yes—but with a few important considerations. Not every brush responds the same way to ultrasonic cleaning, and not every ultrasonic cleaner is designed to handle the subtle complexities of makeup tools. That said, with the right approach and care, ultrasonic cleaning can be an excellent method for deep-cleaning your brushes safely and thoroughly.
How the Method Applies to Bristle Fibers
The most important factor when cleaning brushes ultrasonically is the material and structure of the bristles. High-quality brushes—whether natural or synthetic—consist of tightly packed fibers bound with glue at the base, often within a metal ferrule.
Ultrasonic cavitation is gentle when used correctly. The microbubbles agitate and dislodge stubborn product buildup, including foundation residue, powder particles, oils, and even dried cream makeup. This means:
- Brushes regain their shape and fluffiness faster
- Pigments that were previously stuck near the ferrule loosen and lift
- The cleaning process is far more consistent than manual shampooing
Both synthetic brushes (like Taklon or nylon) and natural bristle brushes (like goat or sable) can be cleaned in an ultrasonic cleaner. However, you should always check the manufacturer’s cleaning instructions, particularly for expensive handmade brushes.
Suitable Brush Types and Handle Materials
Not all brush designs are equally suitable for ultrasonic cleaning. The method is safest and most effective for:
- Dense face brushes, including kabuki and buffing brushes
- Eyeshadow and blending brushes, especially with soft bristles
- Flat concealer or lip brushes, which often hold thick residue
- Fan brushes, which tend to fray when scrubbed manually
As for handles, plastic, resin, and metal are the safest. These materials won’t absorb water and are unlikely to warp or crack during cleaning. Wooden handles, especially unsealed ones, are more vulnerable. Prolonged exposure to water may cause swelling, cracking, or paint peeling.
If you’re cleaning wooden-handled brushes, consider wrapping the handle in plastic wrap or waterproof tape, ensuring only the bristles are submerged.
Risks and Considerations to Watch Out For
While ultrasonic cleaning is effective, it’s not foolproof. Misuse can lead to:
- Loosening of bristles, if the glue inside the ferrule softens
- Handle damage, especially with prolonged heat or submersion
- Distortion of delicate brush heads, if brushes aren’t suspended properly
- Overcleaning, where brushes are cleaned too frequently or for too long
To avoid these issues, keep the cleaning cycle short—typically 5 to 8 minutes—and avoid submerging the entire brush unless the handle is waterproof.
For best results, suspend the brushes so that only the bristles are submerged and they don’t touch the bottom of the tank, allowing full 360° cleaning with minimal risk.
Benefits of Using an Ultrasonic Cleaner on Makeup Brushes
Once you’ve tried ultrasonic cleaning, it’s hard to go back. The level of cleanliness achieved, combined with the reduced effort and quicker drying time, makes it a standout option—especially for those with multiple brushes or professional kits to maintain.
Deep Cleaning Beyond the Surface
Perhaps the most noticeable benefit is how thoroughly ultrasonic cleaners remove hidden buildup. What may appear as a clean brush after manual washing can still harbor product inside the ferrule area or deep between bristles. This residue contributes to brush stiffness, reduced pigment performance, and the spread of bacteria.
Ultrasonic cleaning reaches into the hardest-to-clean areas, ensuring even dense or flat brushes return to their original softness and flexibility. It restores brushes to a level that manual cleaning rarely achieves—especially when dealing with cream-based products or long-wear foundation.
Reduced Bacterial Build-Up Over Time
Dirty brushes don’t just affect makeup—they affect skin. Trapped oils, product, and environmental pollutants can promote the growth of acne-causing bacteria, fungi, and mold. These microbes can then transfer back to your face, contributing to breakouts and inflammation.
Ultrasonic cleaning minimizes bacterial buildup by removing hidden organic material, sanitizing brushes more effectively than a quick rinse. While it doesn’t sterilize (like an autoclave), it significantly improves hygiene, especially when paired with an antibacterial cleaning solution.
This makes ultrasonic cleaning ideal for:
- Makeup artists, who work on multiple clients and need spotless tools
- People with acne-prone or sensitive skin, who must reduce contamination
- Allergy sufferers, for whom residue can cause irritation or flare-ups
Faster Drying, Less Wear from Manual Scrubbing
Manual washing often soaks the entire brush, including the base of the bristles, leading to longer drying times. Plus, squeezing and rubbing can slowly erode the glue that holds the bristles together.
Ultrasonic cleaning uses less water, and because there’s no need for aggressive scrubbing, it helps preserve the structural integrity of your brushes. After ultrasonic cleaning, brushes typically dry faster—especially when positioned upright in a well-ventilated area.
This reduced water absorption means less swelling, less shedding, and a longer lifespan for your tools.
Are There Any Risks to Cleaning Brushes This Way?
Ultrasonic cleaning is a powerful tool—but as with any method, it’s important to understand its limitations and potential pitfalls. When used incorrectly, ultrasonic cleaners can cause damage to brushes, especially those made from delicate materials or lower-quality construction. To use this method safely, users should be aware of a few specific risks and how to avoid them.
Glue Bond Sensitivity in Brush Ferrules
Most makeup brushes are constructed with bristles glued into a metal ferrule, which is then attached to the handle. The glue inside the ferrule is typically designed to withstand water and regular washing—but not all glues are created equal.
Prolonged exposure to heat, vibration, and soaking can weaken the adhesive, especially if the brush is submerged entirely or left in the tank for too long. Over time, this may lead to:
- Loose bristles that shed during application
- Gaps between ferrule and bristles, affecting brush performance
- Complete bristle detachment, rendering the brush unusable
To minimize this risk, always keep the handle and ferrule above the water line, allowing only the bristles to be submerged. Use shorter cleaning cycles, and avoid high temperatures unless the brush is specifically rated for hot water cleaning.
Wooden Handle Swelling and Paint Peeling
Wooden-handled brushes pose a special challenge. Unlike plastic or resin, wood is porous and highly sensitive to moisture. If submerged or exposed to ultrasonic vibration for extended periods, wood may:
- Swell, causing the ferrule to crack or loosen
- Warp, changing the feel and shape of the brush
- Peel or flake, especially if the paint is water-soluble or poorly sealed
This is why most brush manufacturers recommend avoiding immersion of wooden handles entirely. If you’re using an ultrasonic cleaner, wrap wooden handles in plastic wrap or use a clip system to suspend brushes above the liquid surface.
Some professional cleaners offer accessories to suspend items during cleaning. You can also DIY a similar effect using clips and a wooden skewer placed across the tank.
Bristle Damage from Harsh Settings or Solutions
While ultrasonic cleaning is gentle when done right, wrong frequency settings, harsh solutions, or overuse can still damage bristles—especially natural ones. Over-agitation can cause:
- Frizzing or splitting of soft natural hairs
- Loss of shape, especially for angled or detailed brushes
- Rough texture that affects blending performance
The cleaning solution also matters. Avoid anything with alcohol, acetone, or strong solvents. Even commercial brush cleaners may contain ingredients that weaken bristles when exposed to ultrasonic agitation.
Stick with mild dish soap, baby shampoo, or pH-neutral ultrasonic cleaning solutions labeled safe for soft materials. These preserve the natural texture and color of the bristles.
Comparing Ultrasonic Cleaning to Other Brush Cleaning Methods
Is ultrasonic cleaning better than manual washing, or should it be used as a complement? To answer that, it’s worth exploring how this method stacks up against traditional techniques—and where each shines.
Manual Shampooing and Drying
This method has long been the standard: wetting the brush, applying shampoo or soap, massaging with fingers or a textured mat, then rinsing and drying. It offers control and simplicity, but also requires time, physical effort, and careful drying to avoid mildew or shape loss.
Pros:
- Inexpensive and accessible
- Gentle when done carefully
- Great for delicate or handmade brushes
Cons:
- Time-consuming
- Inconsistent results, especially with dense brushes
- Requires long drying periods
Manual cleaning remains essential—especially for ultra-delicate brushes—but it often fails to remove deep-set buildup or bacteria fully.
Brush Cleaning Mats and Tools
These silicone pads, gloves, or palettes are designed to aid manual cleaning by providing texture that dislodges pigment and residue. They work well for liquid foundation and pigmented powder removal.
Pros:
- Improve efficiency of manual washing
- Affordable and reusable
- No electricity required
Cons:
- Still labor-intensive
- Not effective for internal buildup
- Risk of bristle breakage from aggressive scrubbing
These tools are helpful, but they only act on the surface layer of bristles.
Spray-on Cleaners for Quick Jobs
Brush sprays and fast-drying solutions are ideal for spot cleaning between uses, particularly for makeup artists working on multiple clients.
Pros:
- Quick and portable
- Evaporates fast, no rinsing
- Great for color switching
Cons:
- Not a substitute for deep cleaning
- Often contain alcohol that dries bristles
- Won’t remove oil or product trapped inside
Sprays are for convenience, not sanitation. They’re best used alongside other cleaning methods, not instead of them.
Where Ultrasonic Cleaning Fits into a Routine
Ultrasonic cleaning works best as a monthly or biweekly deep-cleaning step, depending on how frequently you use your brushes. It doesn’t replace the need for daily wipe-downs or occasional manual shampooing, but it enhances your routine by:
- Dislodging buildup that surface washing can’t reach
- Extending brush life by reducing friction and over-washing
- Providing a hygienic clean with less effort and more consistency
For many users—especially professionals or those with large brush collections—ultrasonic cleaning fills the gap between convenience and deep sanitation.
Who Should Consider Ultrasonic Cleaning for Brushes?
Ultrasonic cleaning might not be for everyone, but it’s certainly not reserved for laboratories and beauty salons anymore. In recent years, compact and affordable ultrasonic cleaners have become accessible to a broader audience. The question isn’t whether the technology is effective—it is—but whether it fits your lifestyle, usage habits, and level of care for your brushes.
Professional Makeup Artists and Salons
If you’re working with multiple clients a day or rotating through dozens of brushes in a single session, manual cleaning just isn’t sustainable. Not only is it labor-intensive, but it also introduces human error and inconsistency.
For makeup artists, ultrasonic cleaning offers:
- Speed and efficiency—clean multiple brushes at once
- Consistency—every brush is cleaned to the same standard
- Hygiene compliance—essential for working on different faces and skin types
- Longer tool life—less wear-and-tear from scrubbing and drying
Salons, beauty schools, and freelance artists can also use ultrasonic cleaners to sanitize tools between uses without relying solely on alcohol sprays or time-consuming hand washing.
Beauty Enthusiasts with High-End Brushes
If you’ve invested in professional or artisanal makeup brushes—brands like Hakuhodo, Wayne Goss, or Rae Morris—you’re probably aware of how much care they require. The more delicate and expensive the brush, the more you need to avoid excessive friction or over-wetting.
Ultrasonic cleaning helps:
- Protect delicate natural bristles
- Preserve glue and ferrule joints
- Maintain brush shape over time
- Prevent color staining or discoloration
For collectors or passionate users who care about longevity and performance, ultrasonic cleaning adds a level of precision that protects your investment.
People with Skin Sensitivities or Acne-Prone Skin
If you struggle with sensitive, acne-prone, or eczema-prone skin, cleaning your brushes well isn’t optional—it’s essential. Even small amounts of trapped oil, bacteria, or mold can trigger breakouts, rashes, or inflammation.
Ultrasonic cleaning provides a deeper, more consistent clean than most manual methods, reducing the chance of reintroducing irritants to your skin every time you apply makeup. It’s not a cure for skin conditions, but it can certainly help eliminate one of the root causes of persistent irritation: dirty tools.
In these cases, regular ultrasonic cleaning—paired with a gentle drying routine and the right cleanser—can become part of your skincare routine as much as your makeup routine.
How to Use an Ultrasonic Cleaner for Makeup Brushes Properly
Getting the most out of an ultrasonic cleaner comes down to how you use it. Even the best machine can damage brushes if used improperly, while a budget-friendly unit can deliver excellent results with proper care. The goal is to clean thoroughly without compromising the structure of your tools.
Choosing a Gentle Cleaning Solution
Always use a solution that’s pH-neutral, non-abrasive, and free of harsh solvents. For most users, a few drops of baby shampoo or gentle dish soap in distilled water works perfectly.
Avoid:
- Alcohol-based brush cleaners (they dry and fray bristles)
- Vinegar or acids (can corrode metal ferrules)
- Ammonia-based products (especially harmful for natural hair)
Some companies also offer ultrasonic-specific cleaning concentrates for beauty tools, which are pre-formulated to be both effective and safe.
The cleaner the solution, the better the cavitation effect—so always start with fresh water and soap each time you clean.
Ideal Temperature and Frequency Settings
Makeup brushes respond best to moderate ultrasonic frequencies, typically around 40kHz. This provides enough agitation to clean deeply without damaging soft bristles or loosening glue.
As for temperature:
- 30°C to 40°C (86°F to 104°F) is safe for most brush types
- Never exceed 50°C (122°F), especially with wooden handles or glued ferrules
- If your unit heats the water automatically, monitor it and pause if it gets too warm
Some advanced units allow precise control over frequency and heat, but even simple models should offer safe operation if used with care.
Positioning and Suspension Techniques
To prevent damage, your brushes should never rest directly on the bottom of the tank, where vibration is strongest.
Here’s how to position them safely:
- Use a mesh basket or plastic tray that elevates the brushes slightly
- Submerge only the bristle portion, keeping ferrules and handles dry
- If using long brushes, clip or rest them across the top edge using rubber bands and a wooden stick or skewer
- Don’t overcrowd—leave space between brushes for full water circulation
If brushes are floating or tipping over, they won’t clean evenly—and you risk deforming the bristles.
How Long to Run the Cycle and What to Avoid
For most makeup brushes, a 5 to 8-minute cycle is more than enough. Heavily soiled brushes may benefit from a second round, but it’s better to run two short cycles than one long one.
Avoid these common mistakes:
- Running the cycle too long: This can cause glue failure or bristle fatigue
- Using dirty water: Debris floating in the tank reduces effectiveness and may reattach to clean brushes
- Submerging wood or ferrules: This can lead to swelling, cracking, or loosening over time
- Stacking brushes or overcrowding: Reduces cleaning efficiency and increases the chance of fiber damage
After cleaning, gently blot the bristles with a soft towel and allow brushes to air dry upright or horizontally on a drying rack. Avoid heat tools or hair dryers, which can warp bristles or damage glue.
What to Look for in an Ultrasonic Cleaner for Makeup Brushes
Choosing the right ultrasonic cleaner is just as important as using it correctly. While the market is full of generic models and repurposed jewelry cleaners, not all of them are ideal for cleaning brushes. Whether you’re a beginner or a professional, it pays to know what features will protect your tools and enhance your routine.
Tank Size and Brush Capacity
Makeup brushes don’t require a huge tank, but you do need enough room to submerge the bristles without cramping. A tank capacity between 600ml and 1.5L is typically perfect for cleaning 3 to 5 brushes at once without overlap.
Before purchasing, measure your longest brush from bristle tip to ferrule and check the tank dimensions—especially width and depth. It’s better to have a little extra space than to force your tools into a tight or tilted position.
Some compact cleaners are designed for single-item cleaning and may not be suitable for larger brushes or multiple tools at once.
Features That Prevent Overheating or Overcleaning
Look for ultrasonic cleaners with:
- Preset timers: Ideal cycle lengths for brushes range from 3 to 8 minutes
- Auto shut-off: Prevents the unit from running indefinitely if you get distracted
- Heat limiters: Some units automatically cap the water temperature to protect delicate items
- Overheat protection: Extends device life and reduces safety risks
More advanced models include frequency control and digital displays for tracking cycles and settings. These aren’t mandatory for brush cleaning, but they offer added peace of mind for those with delicate or high-end tools.
If you’re using the cleaner for other items (like jewelry or dental tools), those features become even more valuable.
Extras That Make Brush Cleaning Easier
Some ultrasonic cleaners come with accessories that are especially useful for makeup brushes, such as:
- Brush holders or racks that suspend tools without letting them touch the tank bottom
- Plastic mesh baskets that reduce vibration intensity for soft bristles
- Removable lids to prevent water from splashing while still allowing ventilation
- Drain valves or easy-pour spouts for safe solution disposal
Even if your chosen model doesn’t include these, you can often DIY similar solutions using clips, silicone mats, or drying stands designed for brushes.
Don’t be swayed by high wattage or exaggerated marketing claims. The best ultrasonic cleaner for makeup brushes is one that offers precision, safety, and gentle cleaning—not brute force.
Final Thoughts: Is Ultrasonic Cleaning the Best Way to Clean Makeup Brushes?
When used properly, ultrasonic cleaning offers a level of hygiene, efficiency, and convenience that traditional methods can’t match. It reaches deep into bristles, protects your tools from physical abrasion, and reduces drying time. Whether you’re a professional artist or just someone who wants better skin and better brushes, this method brings undeniable advantages.
That said, ultrasonic cleaning isn’t a one-size-fits-all solution. It works best as part of a well-rounded brush care routine. Manual washing still has a place—especially for very delicate brushes or fast spot cleaning. But for deep cleaning, disinfecting, and long-term brush health, ultrasonic cleaners are a smart, science-backed upgrade.
They help keep your brushes looking and feeling new, reduce bacteria that can harm your skin, and make an often tedious task surprisingly satisfying. And once you experience the results, you might never go back to scrubbing brushes by hand again.