Ask any professional who relies on ultrasonic cleaning—whether a jeweler, watch repair technician, dentist, or precision mechanic—and they’ll tell you: the cleaning solution isn’t an afterthought. It’s half the system. Without the right fluid in the tank, even the most powerful ultrasonic cleaner can underperform, or worse, damage delicate surfaces.
That’s because ultrasonic cleaning isn’t magic—it’s physics and chemistry working together. The high-frequency vibrations from the cleaner create microscopic cavitation bubbles that collapse on the surface of the submerged item. These collapses produce tiny jets of energy that dislodge grime, oil, soot, and particles from places no brush or cloth could ever reach. But cavitation alone doesn’t dissolve contamination. That’s the job of the cleaning fluid.
Whether it’s lifting off engine grease, removing polishing paste from a gemstone, or dislodging protein residue from lab glassware, the solution in the tank determines what gets cleaned and how well. Without the right chemistry, cavitation can only do so much—and in some cases, the results will be uneven, or even harmful to your items.
So, what’s the best cleaning solution to use in your ultrasonic cleaner? The answer depends on what you’re cleaning, what material it’s made of, and how stubborn the dirt is.
Let’s break it down.
The Science Behind Ultrasonic Cleaning Fluids
At its core, ultrasonic cleaning is a combination of mechanical agitation and chemical dissolution. Think of it like washing dishes: the water and sponge do the scrubbing, but without dish soap, the grease stays put. Ultrasonic cavitation provides the physical energy—but the solution carries out the actual chemical breakdown of contaminants.

A good ultrasonic cleaning solution contains:
- Surfactants, which reduce surface tension and allow cavitation bubbles to form more easily and penetrate tighter spaces.
- Solvents or detergents, which dissolve oils, flux, polish, rust, or biological debris.
- Chelating agents, in some formulas, which bind to metal ions and enhance stain removal.
- Stabilizers, which prevent re-deposition of dirt and allow longer reuse cycles.
The pH level of the solution plays a big role too. Alkaline solutions are good for organic residues and oils. Acidic ones are more suited for removing rust, scale, or mineral deposits—but can be too harsh for sensitive materials. Neutral-pH solutions offer a safer middle ground for general-purpose cleaning.
Temperature also enhances chemical action. Most solutions perform better when heated—around 40°C to 60°C (104°F to 140°F)—but again, the material being cleaned will dictate how much heat is safe.
This blend of chemistry and cavitation makes ultrasonic cleaning incredibly versatile—but only when the right solution is used.
Matching Solution to Material: Not All Liquids Are Equal
If you’ve ever wondered why your ultrasonic cleaner doesn’t work the same way on every item, the answer likely lies in what you put in the tank.
Different materials respond differently to both cavitation and cleaning fluids. For example:
- Stainless steel parts with grease or carbon buildup will benefit from a heated alkaline degreaser solution.
- Delicate jewelry with soft stones like opals or pearls require a gentle, neutral-pH solution with no ammonia or alcohol.
- Optical lenses or camera filters should only be cleaned with a streak-free, non-ionic solution specifically designed for glass and coatings.
- Printed circuit boards (PCBs) need a residue-free, non-corrosive formula that dissolves flux but doesn’t harm the board or traces.
In other words, the same ultrasonic cleaner could be used to clean a dentist’s instruments in the morning and carburetor jets in the afternoon—but only if the solution is changed between uses.
This is why many industrial and laboratory ultrasonic users keep multiple solution types on hand. It’s not about overcomplication—it’s about protecting their tools and getting the best results possible.
The Real Difference: Tap Water vs. Distilled vs. Deionized
When preparing your ultrasonic cleaner, the type of water you use as a base might seem like a minor detail. It isn’t.
Tap water is the default choice for many people simply because it’s convenient. But tap water varies dramatically by region. In hard water areas, it contains minerals like calcium, magnesium, and iron. These minerals can interfere with cavitation, leave residue on items, and over time may cause mineral buildup inside the tank or even react with sensitive cleaning solutions. While tap water might be acceptable for cleaning heavily soiled metal tools, it’s less ideal for precision components, optics, or jewelry.
Distilled water, on the other hand, is free of dissolved solids and is generally recommended for most ultrasonic cleaning applications—especially in professional environments. Because it’s pure, cavitation performance is consistent, it doesn’t leave mineral stains, and it helps prolong the lifespan of the cleaning tank. Distilled water also ensures that whatever cleaning agents you add are the only active components at play.
Then there’s deionized (DI) water, often used in laboratories and cleanrooms. It’s like distilled water but goes through a different purification method. Deionized water has nearly zero electrical conductivity, which is great for sensitive electronics and semiconductors. However, it’s also more chemically reactive—so you should never use it on reactive metals like aluminum or magnesium without stabilizing additives, as it may corrode the material.
In short:
- Use distilled water for general precision cleaning
- Use DI water for critical electronics or lab equipment (with proper solutions)
- Avoid tap water unless your application is industrial-grade and contamination isn’t a major concern
Water might seem invisible in the equation, but it defines the baseline performance of the entire system.
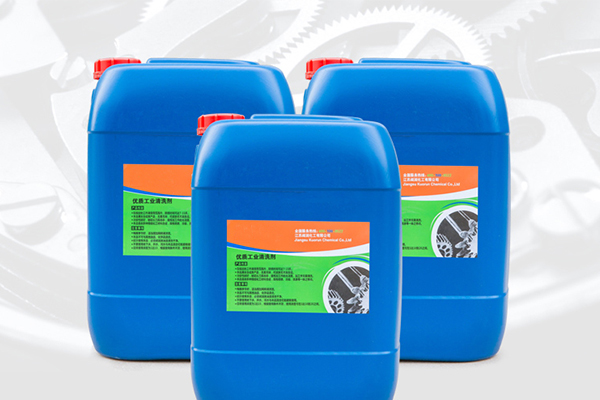
Mixing, Measuring, and Using Solutions Properly
One of the most common misconceptions about ultrasonic cleaning is that “more solution = better cleaning.” It’s a tempting idea—if a little detergent works, why not add more?
Unfortunately, that logic doesn’t hold here. Over-concentration can suppress cavitation by altering the fluid’s surface tension, making it harder for microbubbles to form and collapse. On the flip side, under-dosing your solution may lead to poor cleaning and wasted time.
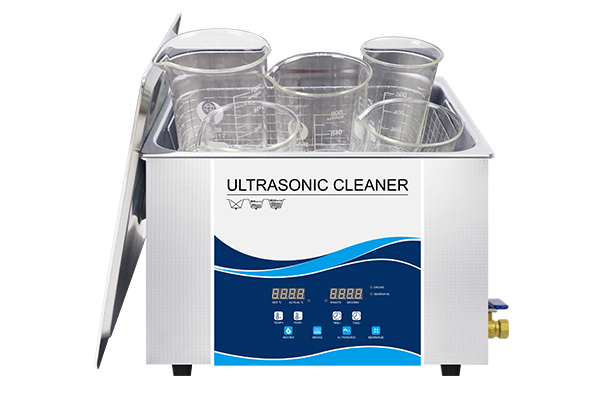
Most professional cleaning solutions come with dilution instructions, usually in ratios like 1:10 or 1:20 (solution to water). For instance, if you’re preparing a 2-liter tank and your solution calls for 1:20, that means you need just 100ml of cleaning fluid mixed with 1900ml of water.
Stirring gently after adding the solution helps ensure even distribution, but don’t go overboard—vigorously agitating the fluid can introduce air and disrupt the degassing process. Speaking of degassing, this is a step many users skip. Freshly mixed solutions are filled with microscopic air bubbles that can interfere with cavitation. Running the cleaner for 5–10 minutes without any items in the tank helps “degas” the liquid and ensures peak performance when cleaning begins.
Another tip: match your temperature settings to the job and solution. Most general-purpose cleaners work best between 40°C and 60°C (104°F to 140°F), but more heat isn’t always better. Soft plastics, adhesives, and heat-sensitive coatings may deform or delaminate above certain temperatures. Always consult your cleaner’s manual and your solution’s datasheet.
And when you’re done? Rinse the cleaned items with distilled water if needed—especially jewelry, lab instruments, or anything that comes into skin contact. This removes any lingering residue from the detergent and gives a cleaner finish.
Ultrasonic cleaning is powerful, yes—but it’s also precise. Treat it like a tool that rewards patience and proper setup.
When (and Why) to Change Your Cleaning Solution
If you’ve ever been tempted to leave your ultrasonic solution in the tank for “just one more cycle,” you’re not alone. It’s a common habit—especially when the liquid still looks clear. But don’t let appearances fool you.
Even if the solution seems clean, it may already be saturated with contaminants. Oils, dissolved debris, and degraded surfactants all reduce the effectiveness of the fluid. Overused solutions can cause re-deposition—where removed grime simply resettles on your items. In some cases, they can even become corrosive or produce odor.
Here are some signs it’s time to change your cleaning fluid:
- Cloudy appearance, even after rest
- Strange smell or discoloration
- Sluggish cavitation (fewer visible ripples or microbubbles)
- Items coming out dull or sticky rather than clean
How often should you change it? That depends on your usage. A jeweler doing light cleaning may get 10–15 cycles per fill, while an auto mechanic degreasing engine parts might need to refresh every 2–3 runs. If you’re cleaning medical or lab tools, best practice is to use a fresh solution every time for hygiene and performance reasons.
Regular tank maintenance also helps. After draining used fluid, give the tank a quick rinse with distilled water and wipe down the interior with a lint-free cloth. This prevents buildup and ensures your next batch of solution performs like it should.
Ultrasonic cleaners are low-maintenance—but like any tool, they reward care.
Real-World Results: When the Right Solution Changes Everything
It’s one thing to read about chemical reactions and cavitation performance. It’s another to see it in action.
Professionals who use ultrasonic cleaners day in and day out—jewelers, optical shops, firearm restorers, watchmakers, and lab technicians—know that choosing the right cleaning solution can dramatically affect outcomes. In fact, many consider it the difference between “clean” and “like new.”
Take watchmakers, for example. Cleaning tiny gears, pinions, and springs from antique mechanical watches is impossible by hand. But when paired with a non-ammoniated solution specially formulated for precious metals and delicate alloys, ultrasonic cleaning restores these components without harm. The wrong solution, however—such as one with high alkalinity or containing ammonia—can corrode brass or strip coatings off balance wheels.
In jewelry repair, professionals know never to toss emeralds, opals, or pearls into a bath of generic degreaser. These stones are porous and can be damaged by harsh solvents or rapid heating. Instead, they rely on neutral pH formulas designed for organic gemstones, often running shorter cycles at lower temperatures to preserve the stone’s integrity.
Even in dental clinics, where tools must be spotless but not corroded, ultrasonic cleaning with enzymatic or neutral enzymatic solutions ensures both hygiene and longevity of delicate stainless-steel instruments. The American Dental Association (ADA) has noted in several guidelines that ultrasonic cleaners, when used with approved solutions, help reduce manual handling risks and improve cleaning consistency before sterilization steps【source: ADA Guidelines on Instrument Cleaning】.
The takeaway? A one-size-fits-all approach rarely works in ultrasonic cleaning. Professionals always adapt solution choice to their specific application—and that’s what yields superior results.
Common Pitfalls When Using Ultrasonic Cleaning Solutions
Even with a high-quality ultrasonic cleaner and premium solution in hand, many users fall into avoidable traps. Here’s how to dodge them.
1. Using the wrong solution for the material.
This is the most frequent and most damaging mistake. For example, using an acidic rust remover on aluminum parts can cause etching. Or applying a high-pH degreaser to silver jewelry might tarnish or pit the surface. Always match your solution to your object type—and when in doubt, test on a small area or check the item’s material compatibility with the fluid manufacturer.
2. Overfilling or underfilling the tank.
The solution level matters. Most ultrasonic cleaners have a “fill line” for a reason. Too much solution can overflow during cavitation, and too little may expose the heating element or transducers, potentially damaging the machine.
3. Skipping the degassing step.
Freshly mixed solutions are saturated with dissolved air, which reduces cavitation intensity. Running your machine empty for 5–10 minutes before cleaning items helps eliminate trapped air and improves cleaning performance dramatically.
4. Not changing the solution frequently enough.
As mentioned earlier, even if your solution looks clean, its chemical potency may be spent. If you’re cleaning sensitive items and the results start looking dull, the solution may be the culprit.
5. Using household cleaners or DIY recipes without caution.
While there are countless YouTube videos showing vinegar, baking soda, or dish soap in ultrasonic cleaners, these aren’t always safe or effective. Vinegar is acidic and may harm sensitive materials. Dish soap can cause excess foaming, interfering with cavitation. Use DIY solutions only if you fully understand their chemistry and compatibility with your cleaner and item.
Ultrasonic cleaning works best when treated like a science—not a guessing game.
Brand-Neutral Guidance Without Over-Promotion
While some ultrasonic cleaner brands offer their own cleaning solutions, it’s often more useful to understand the types of solutions available and match them to your cleaning goals rather than being locked into proprietary fluids.
There are generally five broad categories of ultrasonic cleaning solutions:
- Alkaline cleaners: For metals, plastics, ceramics, and removing organic contamination like oil, grease, or wax.
- Acidic cleaners: For rust, scale, or mineral removal on materials that tolerate mild acids (avoid use on soft metals).
- Enzymatic cleaners: For biological debris like blood, tissue, or food residues; common in medical, dental, or food-processing tools.
- Neutral cleaners: Mild general-purpose formulas, good for sensitive items and delicate surfaces like jewelry or optics.
- Descalers or specialty solvents: For removing polishing compounds, flux, carbon deposits, etc.
Some users also opt for multipurpose concentrates and vary dilution based on application intensity. These allow for flexible, cost-effective operation without sacrificing performance.
When selecting a solution, don’t just consider what it cleans—also consider what it doesn’t damage.
Backed by Experts: Research-Driven Validation
It’s one thing to trust user experience, but ultrasonic cleaning has long been validated by professional and scientific institutions. Studies have proven the efficacy of ultrasonic cleaning when paired with appropriate solutions—especially in sensitive fields like dentistry, manufacturing, and laboratory work.
For instance, a study published in the Journal of Dental Hygiene confirmed that ultrasonic cleaning with enzymatic detergents is more effective at removing debris from dental instruments than manual scrubbing, especially in hard-to-reach areas like hinges or serrations. The study emphasized that enzyme-based solutions, when paired with cavitation, break down proteins more efficiently and help reduce infection risk.
Similarly, the CDC’s Guidelines for Disinfection and Sterilization in Healthcare Facilities specifically recommend ultrasonic cleaning as a pre-treatment step before sterilization, particularly for instruments with complex designs.
In industrial settings, ultrasonic cleaners are routinely used with alkaline and solvent-based degreasers to prepare metal surfaces before coating or welding. The European Federation for Welding, Joining and Cutting (EWF) notes ultrasonic cleaning as a highly recommended preparation method due to its ability to remove invisible contaminants that cause weld failures.
These expert perspectives confirm what power users already know: ultrasonic cleaning, when paired with the right solution, delivers professional-level cleanliness without abrasive damage or labor-intensive effort.
Safety, Storage, and Disposal of Cleaning Solutions
Because ultrasonic cleaning often uses chemical agents, it’s important to handle them with the same care you would for other household or laboratory chemicals.
Storage: Always store cleaning solutions in their original, labeled containers and keep them away from direct sunlight or extreme temperatures. Many cleaning agents have specific shelf lives, especially enzymatic or biologically active ones. Using expired solution can lead to reduced effectiveness and possible contamination.
Usage safety: While many ultrasonic cleaning solutions are mild, some are caustic or acidic. Wear gloves and protective eyewear when handling concentrates. Ensure your cleaning station is well-ventilated, especially if using solvent-based formulas that may release fumes.
Disposal: Do not pour used cleaning fluid down the sink—especially those containing oils, metals, or solvents. Most local regulations require such fluids to be disposed of as chemical waste. Some solutions are biodegradable, but you should still check your local municipal guidelines. If you’re operating in a commercial or industrial setting, maintain a proper waste disposal log and partner with a certified chemical disposal company.
Keeping your cleaning process safe protects not just your equipment, but also your health and environment.
The Bottom Line: Small Details, Big Difference
Ultrasonic cleaning isn’t magic—it’s science, precision, and chemistry working together. And while the machine plays a vital role, the solution you use is just as important. Whether you’re restoring the sparkle to a wedding ring, removing flux from a PCB, or degreasing tools for assembly, the right fluid determines how effective (and safe) the process is.
There’s no single “best” solution, but there is always a right solution for each job.
Take the time to understand your material, your cleaning goal, and your cleaner’s specs. Follow dilution instructions. Degas your fluid. And yes, change it out when it’s time. These small acts of attention turn your ultrasonic bath from a gadget into a high-performance tool—one that delivers repeatable, professional results.
If you’re serious about precision, this is where it begins.